Our support team may ask you to grant us access to your Cloudflare account so we can troubleshoot an issue you have reported, make changes you have requested, or assist with DNS and website security settings.
We recommend keeping Maxer as an additional member of your Cloudflare account, even after your support request has been resolved, so we may provide faster support and respond proactively to potential issues.
Adding Maxer does not affect your ownership or control of your Cloudflare account. You choose which permissions we receive, and you can change or remove our access at any time by deleting cloudflare@maxer.com from your account's Members list.
This guide explains how to invite our team to your Cloudflare account.
Before you begin
-
You must have the Super Administrator role on the Cloudflare account to invite members.
-
The email address you use to log in to Cloudflare must be verified. If it is not, Cloudflare will refuse the invitation. See the troubleshooting section at the bottom of this article if you receive this error.
Steps
-
Log in to the Cloudflare dashboard at https://dash.cloudflare.com/login
-
If you have more than one Cloudflare account, make sure the correct account is selected. The selected account is shown at the top of the left-hand sidebar, and you can click it to switch accounts.
-
In the left-hand sidebar, expand Manage account and click Members.
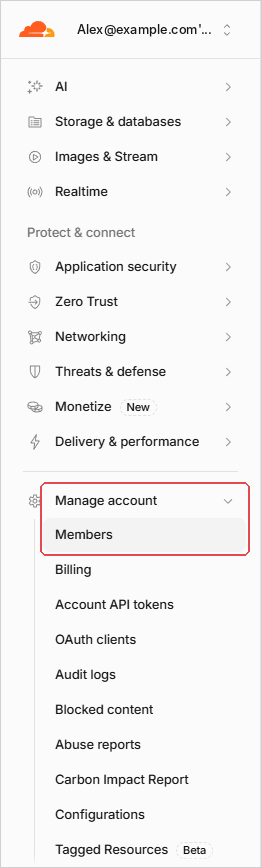
Note: The Manage account menu only appears in the account section and not in the domain section. If you can't find it, go to https://dash.cloudflare.com and scroll down to the bottom of the left-hand sidebar.
-
Click the Invite members button in the top right corner.

-
Under Add email addresses, enter our email address: cloudflare@maxer.com and press Enter. It will appear as a tag in the box.

Important: Please double check the email address. It must be cloudflare@maxer.com and not any other email address. Our sales and support addresses are not associated with Cloudflare and should not be used. We won't be able to accept invitations sent to other email addresses.
-
Under Add permission policies, leave the scope set to your account and Entire account, unless you only want us to have access to specific domains. Then, under Overall roles, switch on the Administrator role.
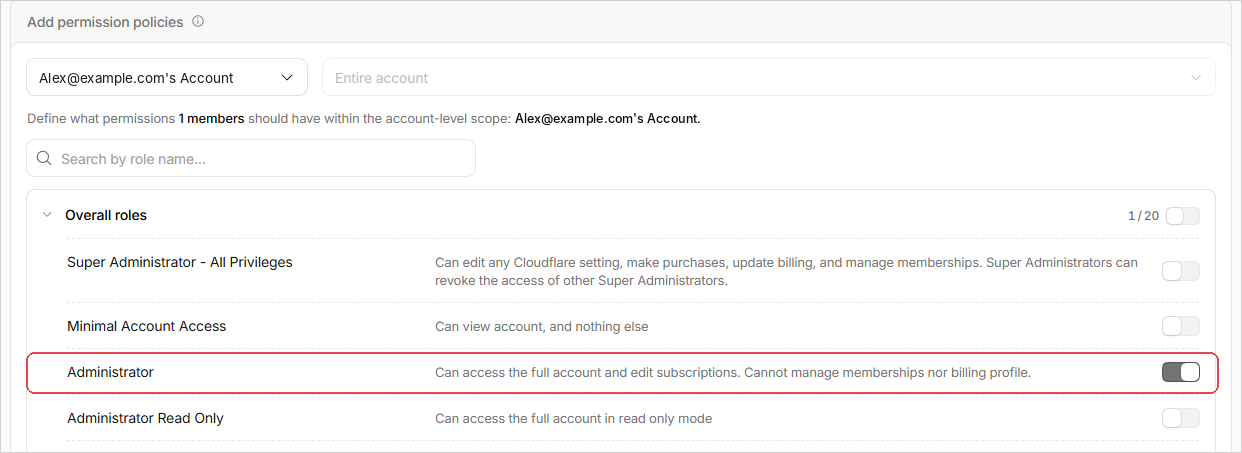
We recommend Administrator, which is described by Cloudflare as "Can access the full account and edit subscriptions. Cannot manage memberships nor billing profile." You are free to select different options, but please be aware that we may not be able to resolve your issue if the permissions are too limited.
-
Scroll down the page and click the Create policy button. The Invite members button at the bottom of the page stays greyed out until a policy has been created.

-
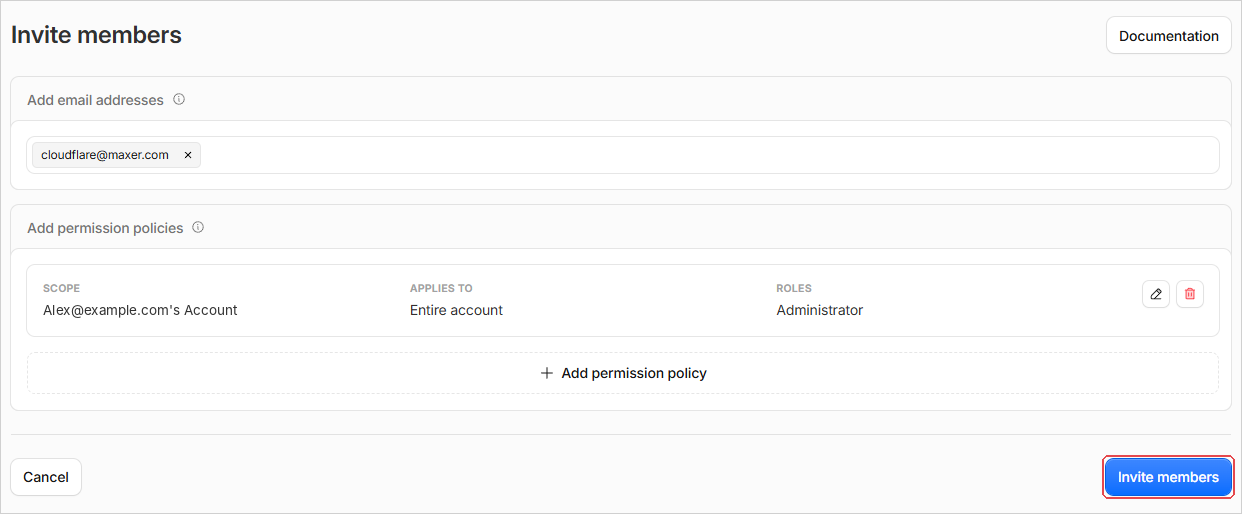
Review the summary. It should show cloudflare@maxer.com, your account as the scope, Entire account (or the domains you selected) and the Administrator role. If anything is incorrect, use the pencil icon to edit the policy. When you are happy with the settings, click the Invite members button.
-
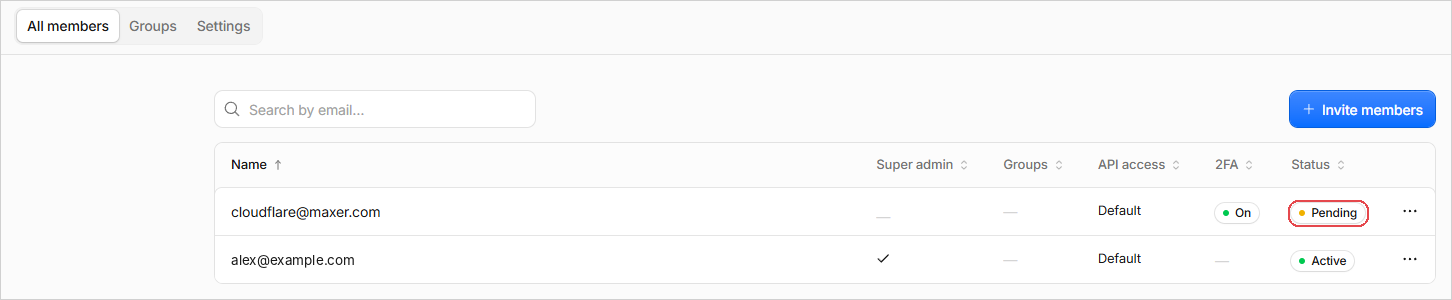
Cloudflare will confirm that the invitation was sent, and cloudflare@maxer.com will appear in your Members list with the status Pending. The status changes to Active once our team has accepted the invitation.
-
If you are granting access as part of an existing support request, please reply to your support ticket to let our team know. Otherwise, no further action is required once the invitation has been sent.
We recommend leaving our access in place so that we can assist you more quickly in the future and take proactive action if we become aware of any issues affecting your website. However, this is entirely optional, and you can remove our access at any time through your Cloudflare account's Members section.
Troubleshooting: "you must verify your email address"
If Cloudflare shows the following error when you click Invite members, the email address on your Cloudflare login has not been verified yet. Cloudflare only allows verified users to invite members.
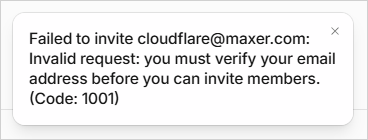
To verify your email address:
-
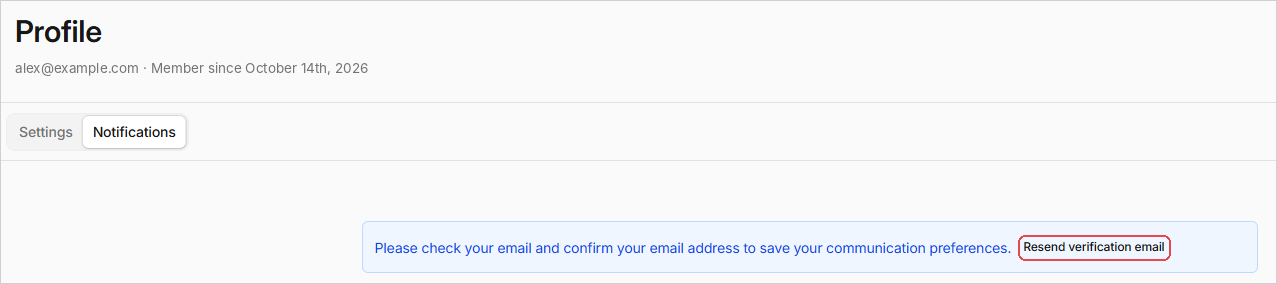
Go to the Notifications tab of your Cloudflare profile at https://dash.cloudflare.com/profile/notifications
-
In the blue banner at the top of the page, click Resend verification email. Cloudflare will confirm with a "Verification email sent" message.
-
Open the email from Cloudflare and click the verification link inside it.
Note: If the verification email doesn't arrive within a few minutes, please check your spam or junk folder, as well as any quarantine in your spam filter or email security service. Verification emails can occasionally be caught by spam filters. If you find it, release it or mark it as not spam, and then click the verification link. If you can't find it, click Resend verification email again.
-
Once your email address has been verified, return to Manage account > Members and start the invitation again from the Invite members step above.
There is a full guide on managing account members here: Cloudflare's guide to managing account members
Updated by SP on 14/10/2026