Managing DNS (Domain Name System) zone records is crucial for directing traffic to your website, email servers, and other services. cPanel provides a user-friendly interface to manage these DNS records easily. This article will guide you through the process of managing DNS zone records for your domain in cPanel.
Important notes:
- Incorrect changes to the DNS zone may cause the domain name or services related to it (website, emails and others) to become unavailable or to no longer work correctly. Please edit these records carefully and don't hesitate to contact our support team if you need help.
- Some DNS records may already exist and may require to be edited only. It's recommended to check first if a DNS record is already available before adding a new one.
- This often applies to SPF records, DKIM records, A or AAAA records of the root domain (e.g. example.com), and the CNAME record of the "www" sub-domain (e.g. www.example.com).
- A cPanel account (either web hosting or DNS-only) is required for hosting DNS zones with Maxer.
- Some technical documentation use the
@symbol as as a placeholder for your domain name. However, cPanel does not use this method. In cPanel, you should simply enter the domain name likeexample.com.instead of@.
Don't Have a cPanel Account?
To manage the DNS technical records for your domain name, you'll need either a web hosting plan (such as "Plan 1" hosting) or a DNS-only service (such as our"cPanel DNS Connect" service). Both plans can be ordered here: https://my.maxer.com/cart.php
Our Plan 1 hosting service is a great option if you want to host a website and set up email accounts. It includes a cPanel control panel to manage the DNS technical records and plenty of other features.
Our DNS-only service (called "cPanel DNS Connect") is available if you plan to host the site and email service elsewhere, or just set up URL redirects and email forwarders. This service has a small annual fee — about the price of a cup of coffee — which covers the enterprise-grade hardware, software, and cPanel licensing needed to provide fast, reliable DNS hosting around the clock.
Important notes about cPanel DNS Connect:
- Each business should have its own cPanel DNS Connect service; for privacy reasons it should not be shared between businesses.
- You can add up to 50 domain names for the same legal entity/business to a single cPanel DNS Connect service.
- If you have more than 50 domain names, you can order an additional cPanel DNS Connect service when required.
Accessing the DNS Zone Editor
-
Open cPanel:
- Log in to the cPanel control panel of your hosting account - Accessing your hosting control panel (cPanel)
-
Locate the Zone Editor:
- In the Domains section, click on Zone Editor:

- In the Domains section, click on Zone Editor:
-
Select Your Domain:
- Find the domain you wish to manage and click on the "Manage" button:
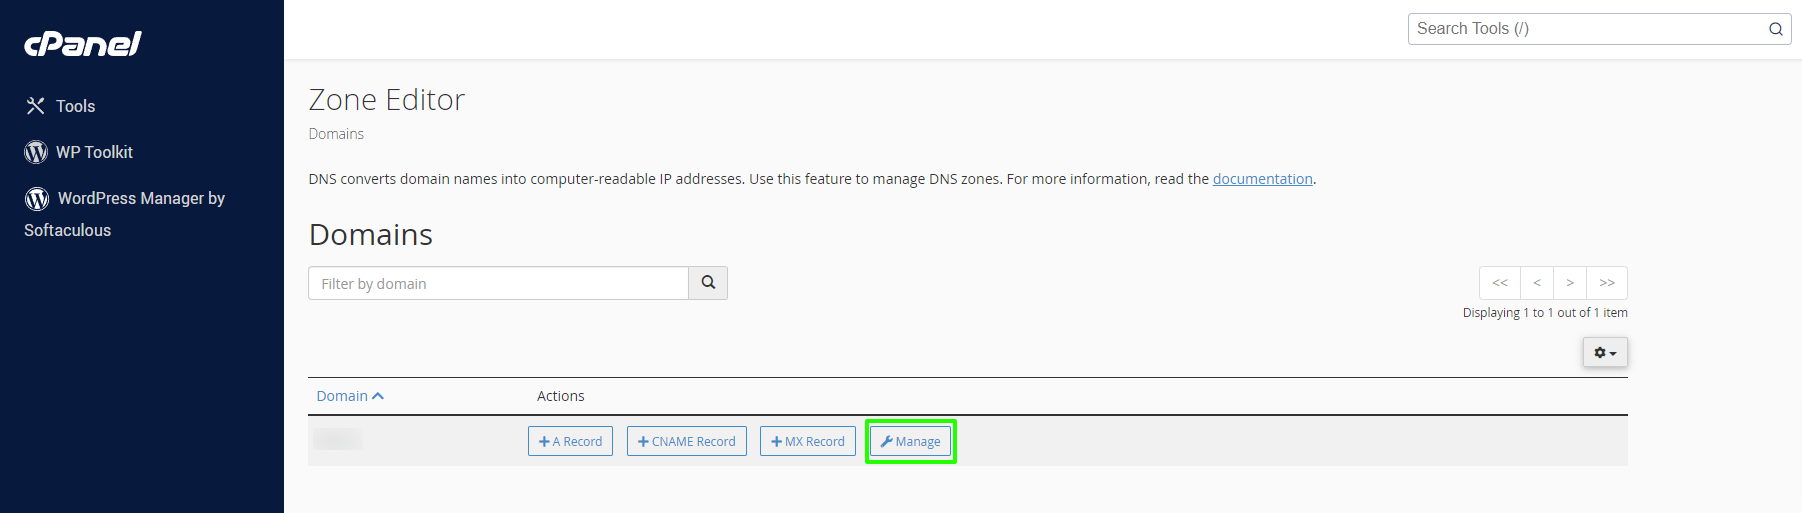
- Find the domain you wish to manage and click on the "Manage" button:
Types of DNS Records
Common DNS Record Types
- A Record: Maps a domain to an IPv4 address.
- AAAA Record: Maps a domain to an IPv6 address.
- CAA Record: Defines which Certificate Authorities (CAs) are allowed to issue SSL certificates.
- CNAME Record: Aliases one domain name to another.
- DMARC Record: Tells receiving mail servers what action to take for unauthenticated emails they get from your domain.
- MX Record: Tells to which email server(s) to direct emails.
- SRV Record: Specifies services available in the domain.
- TXT Record: Holds arbitrary text data, often used for verification and security.
Managing DNS Records
Adding a DNS Record
-
Add the CNAME Records:
- Click on the drop-down arrow of the "+ Add Record" button:
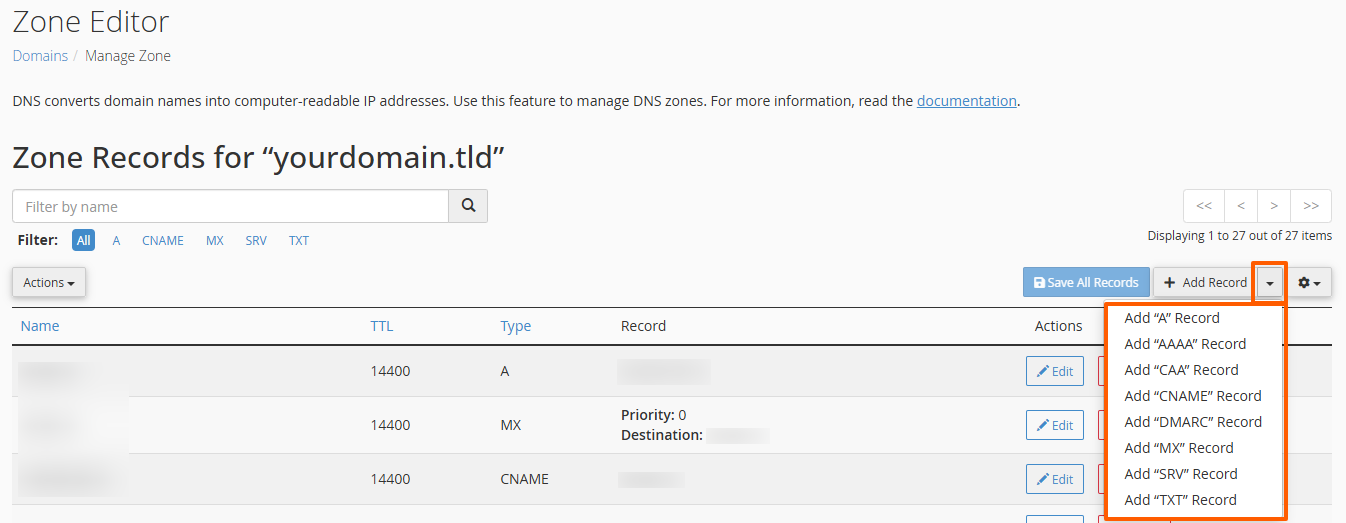
- Click on the drop-down arrow of the "+ Add Record" button:
-
Add an A (for IPv4) or AAAA (for IPv6) Record:
- Click on the + Add Record.
- Select A Record or AAAA Record from the drop-down menu.
- Enter the Name (e.g.,
wwworsubdomain), the TTL (Time to Live), and the Address (IPv4 or IPv6 address). - Click Add Record to save.
-
Add a CAA Record:
- Click + Add Record and select CAA Record.
- Enter the Name (your domain name) and the TTL
- Select the Issuer Critical Flag:
- Whether the certificate authority (CA) will issue an SSL certificate if the CAA Resource Record contains unknown property tags.
- 0 — Non-critical. The CA will issue an SSL certificate if the CAA Resource Record contains unknown property tags.
- 1 — Critical. The CA will not issue an SSL certificate if the CAA Resource Record contains unknown property tags.
- If set to "1", the certificate issuer must understand the tag in order to correctly process the CAA record.
- For more information about CAA record flags, read the RFC 6844 documentation.
- Whether the certificate authority (CA) will issue an SSL certificate if the CAA Resource Record contains unknown property tags.
- Select the Tag, which is the type of CAA record that this DNS entry represents.
- The
issueandissuewildvalues represent the certificate authority’s domain name.- Enter the certificate authority's (CA) domain name in the Value input field.
- For example,
letsencrypt.orgfor Let's Encrypt orsectigo.comfor Sectigo.
- For example,
- Enter the certificate authority's (CA) domain name in the Value input field.
- The
iodefvalue is the location to which the authority reports exceptions.- Enter the location to which the certificate authority will report exceptions in the Value input field (either a
mailtoor standard URL).
- Enter the location to which the certificate authority will report exceptions in the Value input field (either a
- The
- Click Add Record to save.
-
Add a CNAME Record:
- Click + Add Record and select CNAME Record.
- Enter the Name (the alias), the TTL, and the CNAME (canonical name).
- Click Add Record to save.
-
Add a DMARC Record:
- Click + Add Record and select DMARC Record.
- Select the Policy (for the root domain)
- Under Optional Parameters, select the Subdomain Policy for sub-domains.
- For more detailed information about the other options, please check this article: How to create a DMARC record
- Click Add Record to save.
-
Add an MX Record:
- Click + Add Record and select MX Record.
- Enter the Priority, the Destination, and adjust the TTL if necessary.
- Click Add Record to save.
-
Add a TXT Record:
- Click + Add Record and select TXT Record.
- Enter the Name, the TTL, and the Record (text data).
- Click Add Record to save.
Editing a DNS Record
Some types of DNS records can only be added once and may already exist, so editing them is necessary instead of adding a new record.
-
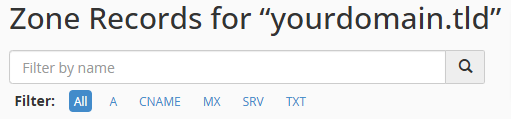
Locate the Record:
- In the Zone Editor, scroll to find the record you wish to edit or use the search field to filter records.
- Click Edit next to the record:

- In the Zone Editor, scroll to find the record you wish to edit or use the search field to filter records.
-
Make Changes:
- Modify the Name, TTL, or other relevant fields.
- Click Save Record to apply the changes:

Deleting a DNS Record
-
Locate the Record:
- In the Zone Editor, scroll to find the record you wish to edit or use the search field to filter records (see the above screenshot).
- Click Delete next to the record:

-
Confirm Deletion:
- A confirmation prompt will appear. Click Delete to confirm and remove the record.
Tips for Managing DNS Records
- Propagation Time: DNS changes can take up to 24 hours to propagate globally, but usually, it happens within a few hours.
- Record Accuracy: Ensure all records are accurately entered to avoid downtime or misdirected traffic.
- Backup: Before making significant changes, consider taking a screenshot or noting down the current DNS settings.
- TTL Settings: Lower TTL values can help speed up propagation for changes, but higher TTL values reduce the load on the DNS servers.
Conclusion
Managing DNS zone records in cPanel is straightforward with the Zone Editor. By following this guide, you can efficiently add, edit, and delete DNS records to ensure your domain name functions correctly. For more detailed information or assistance, refer to the official cPanel documentation:
You can find other similar articles for setting up or verifying your domain name for specific third-party services, such as Squarespace, MailChimp, Google Workspace, etc. in the DNS category of our knowledgebase: https://my.maxer.com/knowledgebase/4/Domains-or-DNS
If you are not sure how to manage the DNS records, please contact our support team for assistance.
Updated by WR on 28/01/2026


