Authenticating your domain in MailChimp involves adding specific DNS records to your domain's DNS settings. This process helps verify your domain ownership and improves email deliverability. Please follow the steps below to add the required DNS records for MailChimp domain authentication.
Prerequisites
- Access to cPanel for your domain.
- A verified MailChimp account with the domain you wish to authenticate.
Steps to Add DNS Records in cPanel for MailChimp Domain Authentication
-
Log in to MailChimp:
- Sign in to your MailChimp account.
- Navigate to the Account Settings.
-
Navigate to Domain Authentication:
- Click on your profile name in the lower-left corner of the MailChimp dashboard.
- Select "Account".
- Go to the "Settings" tab.
- Click on "Domains".
-
Add a Domain:
- Click "Add a Domain".
- Enter the email address that uses the domain you want to authenticate.
- Click "Send Verification Email". MailChimp will send a verification email to the provided address.
-
Verify Your Domain:
- Open the verification email and click on the provided link to verify your domain ownership.
-
Get DNS Records:
- After verification, return to the MailChimp Domain Authentication page.
- MailChimp will provide two DNS records: a DKIM (DomainKeys Identified Mail) record and an SPF (Sender Policy Framework) record.
-
Log in to cPanel:
- Log in to your cPanel account using your credentials - Accessing your hosting control panel (cPanel)
-
Navigate to DNS Zone Editor:
- In the cPanel dashboard, locate the "Domains" section.
- Click on the "Zone Editor" button:

-
Select Your Domain:
- Find the domain you wish to authenticate and click on the "Manage" button:
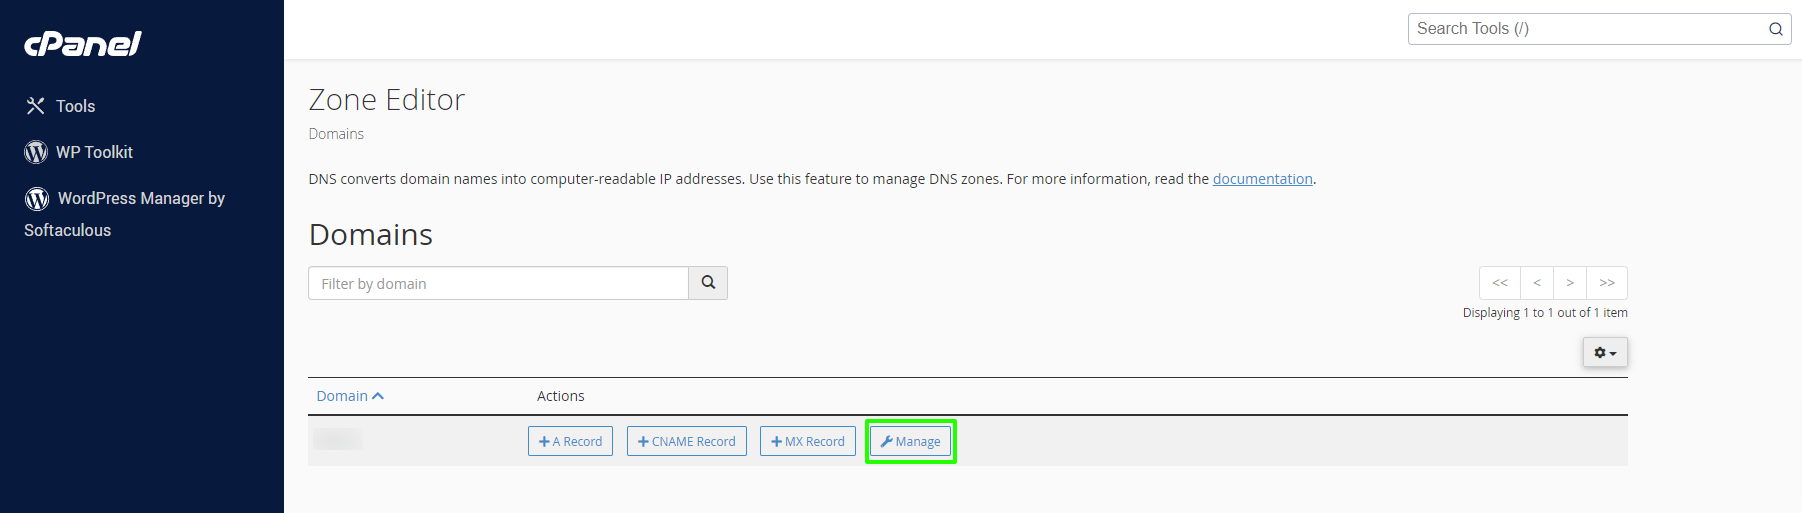
- Find the domain you wish to authenticate and click on the "Manage" button:
-
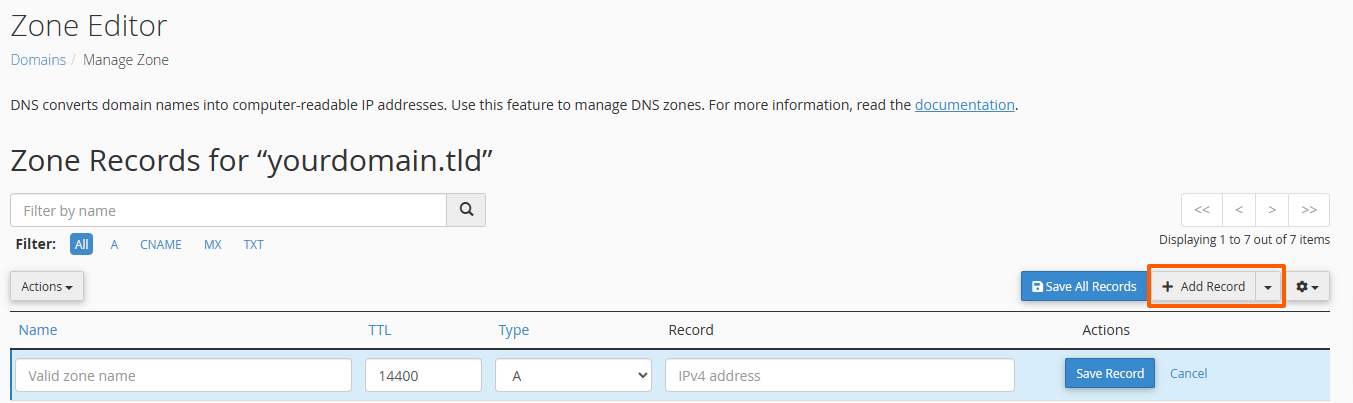
Add the CNAME Records:
- Click on the "Add Record" button:
- Name: This will be a specific subdomain provided by MailChimp, typically in the format
k1._domainkey.yourdomain.com. In cPanel, only need to enterk1._domainkey. - Type: CNAME
- Record: This will be the target address provided by MailChimp, such as
dkim.mcsv.net. - Click on the "Save Record" button and add the second CNAME record in the same way.
- Click on the "Add Record" button:
Add a DMARC Record
MailChimp requires a DMARC record to be in place for the domain name. If you haven't added a DMARC record for your domain already, we have a separate guide that goes through the steps of adding one here:
This record can be added on the same "Zone Editor" page on which you've added the CNAME records in the previous steps.
Wait For Your Changes to Apply
The new DNS records may take some time to propagate, typically anywhere from a few minutes to 48 hours. If you are unable to proceed to the next steps, please continue later or check if the DNS records are correct.
Confirm Authentication in MailChimp
After the DNS records have propagated, return to the MailChimp Domain Authentication page:
- Click "Verify" next to your domain.
- MailChimp will check the DNS records and confirm if the domain is successfully authenticated.
Troubleshooting
- DNS Propagation Delay: DNS changes can take up to 48 hours to propagate. If MailChimp cannot verify the domain immediately, wait a few hours and try again.
- Incorrect DNS Records: Double-check that you have entered the DKIM and SPF records correctly. Ensure there are no typos and that the records are properly formatted.
Conclusion
Adding DNS records in cPanel for MailChimp domain authentication is a straightforward process that involves updating your domain's DNS settings. By completing this process, you improve the deliverability of your emails and verify your domain ownership, helping to ensure your email campaigns are successful.
If you encounter any issues, please contact our technical support team or the MailChimp support team for further assistance.
Updated by SP on 30/05/2024


