This article is intended for customers who have moved, transferred, or cloned a WordPress website and need to update the URL or domain name and absolute paths stored in the WordPress database.
This is commonly required after:
-
Manually copying a WordPress site from another server
-
Moving a site to a new domain or URL
-
Restoring a site into a different directory
-
Cloning a site outside of the WordPress Management tool
Important Notes
-
Always create a full database backup before running a search & replace operation.
-
This process modifies database content directly.
-
This tool updates database values only.
It does not update:-
Hard-coded paths in configuration files
-
Absolute paths in custom scripts
-
References stored outside the database
-
If you copied WordPress files to another directory on the same hosting account, using search & replace is not recommended.
In this scenario, the site should be cloned properly instead:
Step 1: Install the Plugin
-
Log in to the WordPress Admin Dashboard of your site (e.g. https://www.example.com/wp-admin).
-
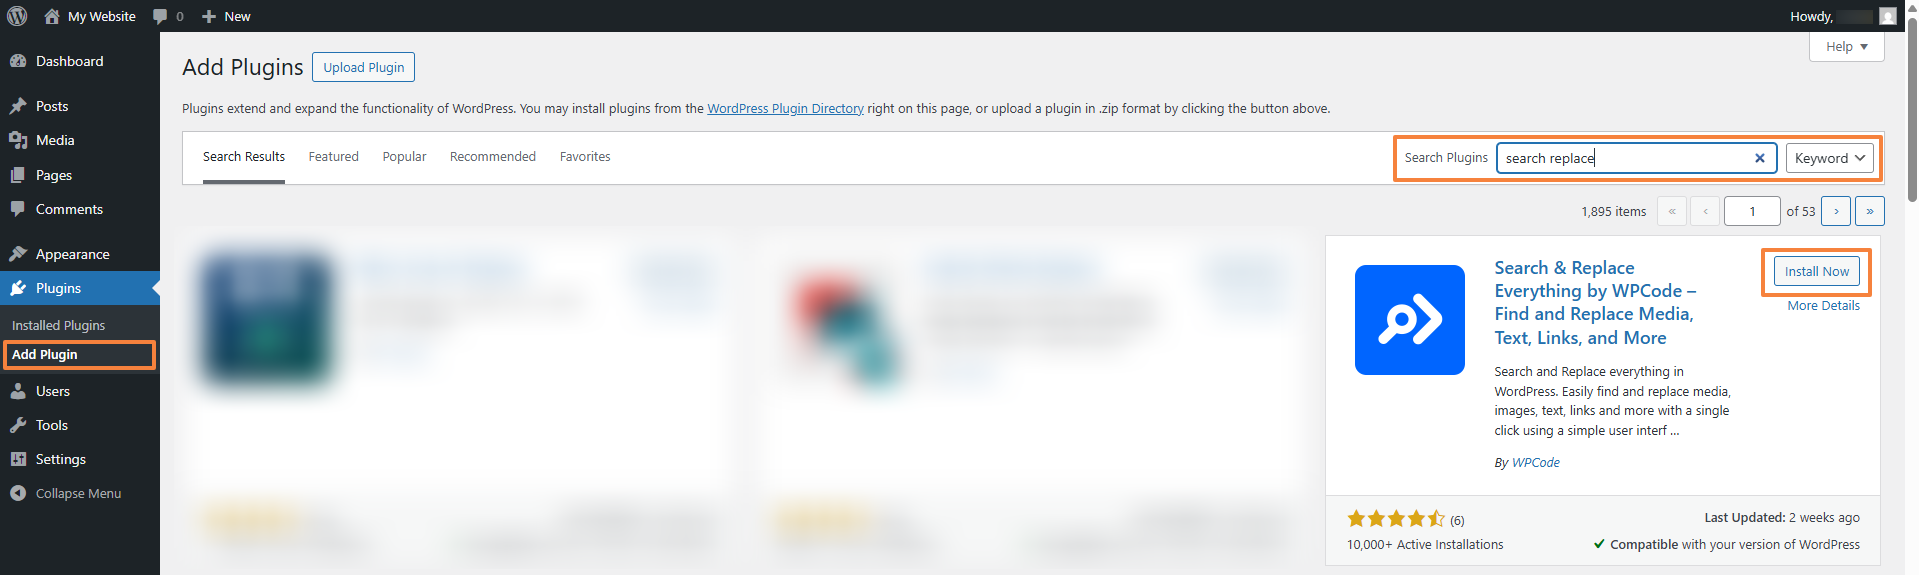
Go to Plugins → Add Plugin.
-
Search for Search & Replace Everything.
-
Install the Search & Replace Everything plugin by WPCode.
-
Activate the plugin.
Plugin page: https://wordpress.org/plugins/search-replace-wpcode/
Step 2: Open the Search & Replace Tool
-
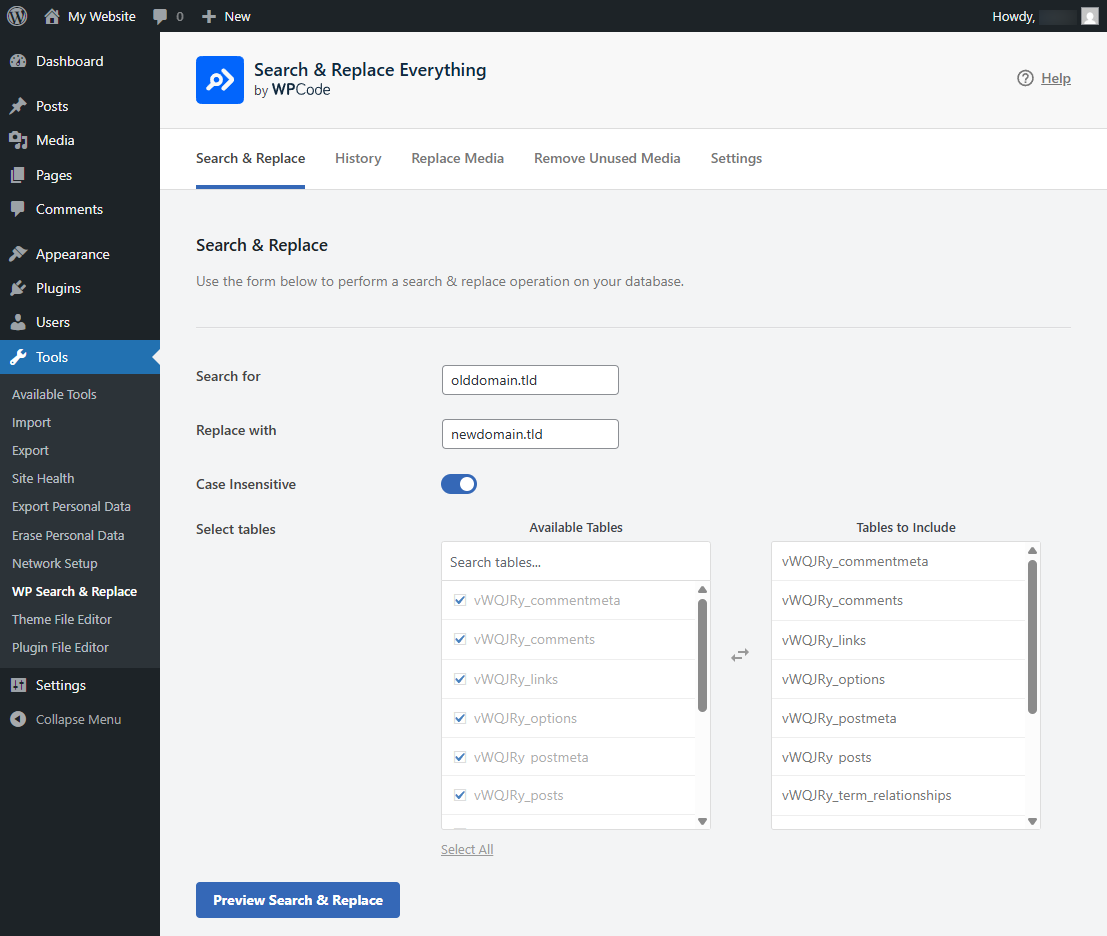
In WordPress, go to Tools → WP Search & Replace.
-
You will see the Search & Replace interface.
Step 3: Configure the Search & Replace Operation
Fill in the fields as follows:
Example - Search for:
Example - Replace with:
This is only an example — use your actual domain names or URLs.
Additional settings:
-
Enable Case Insensitive
-
Select all WordPress tables (usually prefixed with
wp_or a custom prefix)
This ensures URLs stored in:
-
Posts and pages
-
Menus
-
Widgets
-
Plugin settings
-
Serialized data
are updated safely
Step 4: Preview the Changes (Strongly Recommended)
-
Click Preview Search & Replace.
-
Review the Before and After values carefully.
-
Confirm that:
-
The old domain or URL is replaced correctly
-
No unintended data is being modified
-
Only proceed if the preview looks correct.
Step 5: Run the Replace Operation

-
Click Replace All.
-
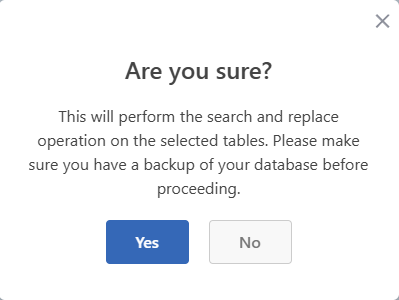
Confirm the warning prompt by clicking on the Yes button:
-
Wait for the process to complete.
Once finished, the database will contain the updated domain / URL references.
Updating Absolute Paths (If Applicable)
If the site was moved to a different directory path, you may also need to run additional replacements, for example:
Example - Search for:
Example - Replace with:
This is only an example — use the actual absolute paths.
⚠️ Only do this if you are certain the path exists and is correct. Incorrect path replacements can break plugins or themes.
What This Tool Does Not Update
After completing the database update, you may still need to manually check:
-
wp-config.php -
Custom configuration files
-
Hard-coded paths in themes or plugins
-
Custom scripts referencing absolute URLs or file paths
-
.htaccessrewrite rules
When This Method Should Not Be Used
Do not use search & replace when:
-
Copying a site to another folder or domain on the same account
-
Creating a staging copy
-
Testing changes on a duplicate site
In these cases, always use WordPress Management → Clone instead.
Related Articles
Final Notes
Running a proper search & replace is a critical step after moving a WordPress site. Skipping this often results in:
-
Broken links
-
Mixed content warnings
-
Redirect loops
-
Incorrect admin URLs
If you are unsure about any step, it is strongly recommended to consult a developer before proceeding.
Updated by SP on 23/12/2025


